Creating a Custom Calculator for your Wix website
In this guide, we'll walk you through the process of creating your initial interactive calculator using Wix Calculator Builder. Our focus will be on constructing a calculator for determining the volume of a rectangular shape.
Let's get started building your first interactive calculator!
- Go to the Wix App Market in the left menu of your Wix website editor.
- Search for the Calculator Builder by Lumifish and click on Add to site.

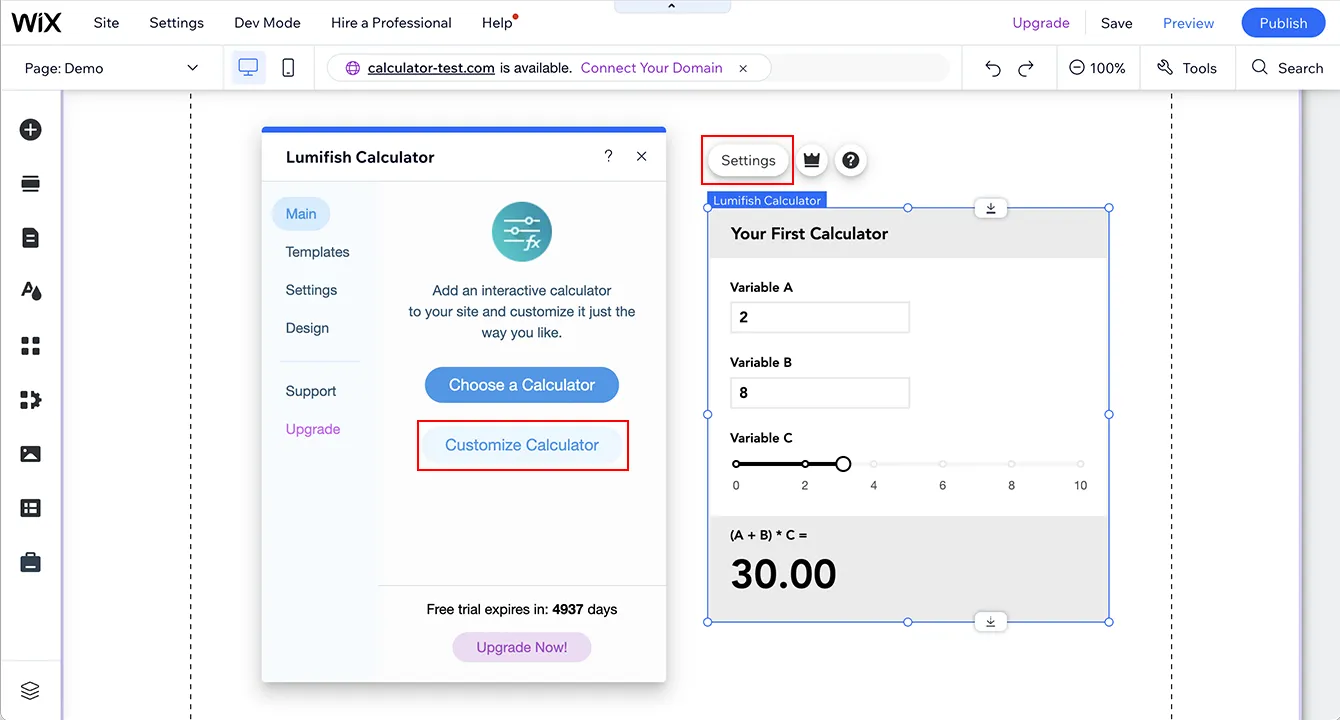
- A basic already prepared calculator will be added to your website. Click on Settings and choose if you want to edit this calculator by clicking on Customize Calculator or choose a calculator from the templates by clicking on Choose a Calculator button.
- This time, let’s choose to edit the current calculator. Click on Customize Calculator.

- In the calculator editor pop-up, you can find the element list on the left, chosen element settings on the right and you can add and delete elements with the button at the top.
- Delete all of the current elements from the calculator with the red Delete button at the top to start from scratch.

- Click the + New Entry Field at the top.
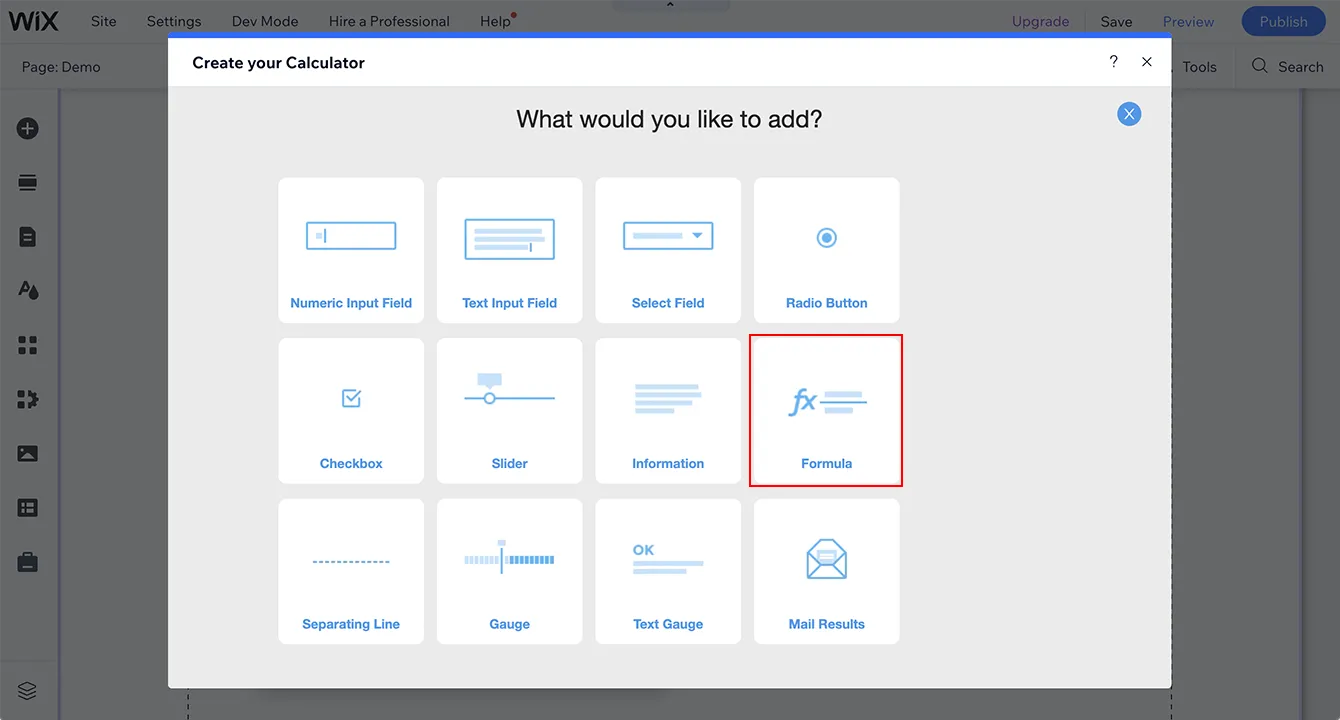
- Here you can see a list of different input field types and tools that can be added to your interactive calculator. This time, let's choose Numeric Input Field.

All the calculator element settings are available on the right side. To reach them, simply click on the element you want to configure.
- You can change the label of a numeric input field by adding the preferred name to the input field below the Input field label. For example, this time let's add
Widthas the input field's name.
- In the Min. and Max. input fields you can set the lowest and highest value that can be added to the input field by a user. If you don't want to have any limitations set, leave these input fields blank. While rectangular width can't be a negative and we don't want to have limit set on the highest value, let's add
0to the Min. input field, and leave the Max. input field blank.
- To explain to your visitors what kind of data you want them to enter, you can add a prefix or postfix to your input field. In our example we want visitors to enter measurement in feet, so let's add
feetto the input field below the Postfix label.
- When we are done with our first input field, let's add a second input field for rectangular length. Click the + New Entry Field (Add New Element) at the top and choose Numeric Input Field again.
- Repeat steps 9, 10 and 11 to setup this input field. However, add
Lengthas the label of this input field instead ofWidth. - To add a third input field for rectangular height, click the + New Entry Field and this time choose Slider. It's not a typical input field for a volume calculator, but we want to show you how different types of input fields can shape your interactive calculator.

- Name the input field by adding
Heightto the input field below Slider field label.
- Set your slider's range by adding Min. and Max. values. Please note that the slider's Min. and Max. input fields can't be blank! Add
0as the Min. value, and1000as the Max. value.
- You can add points to your slider to make it easier to use and look better. All points are to be separated by comma. Let's add the following points to your slider -
0, 250, 500, 750, 1000.
- Finish customizing the slider by adding a postfix. To do so, add feet to the input field below the Postfix label.

- Now, when you’re done with all needed input fields, let's add the element that outputs the results of your interactive calculator. To do that click the + New Entry Field (Add New Element) at the top and choose Formula.

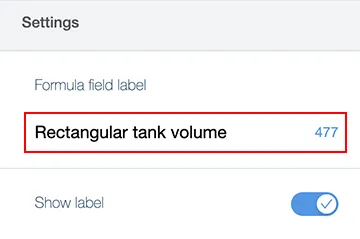
- Name your formula field by adding
Rectangular tank volumeto the Formula field label input field.
- Add the following formula to the input field below the Formula label -
#1 * #2 * #3. How do we get this formula? Every single element of a calculator gets its own ID that consists of a hashtag and a unique number. As you can see, the ID of the Width input field is #1, and the ID of the slider is #3. The conventional formula for finding the volume of a rectangular prism is the following: Volume = Length * Height * Width. So we replace Length, Height and Width variables with the IDs of the web calculator elements.
- Finish customizing the formula element by adding a postfix. To do so, add
sq. feetto the input field below the Field Postfix label.
- Close the calculator editor by clicking X at the top right corner and click on Settings.
- Add a preferred title to the input field below the Calculator Title label.

And you are done creating your first calculator!
For any further questions or assistance, please don't hesitate to reach out to our dedicated customer support team at wix.support@lumifish.com.
Frequently asked questions
Can I embed a calculator on multiple pages of my Wix website?
Yes, once you've created your wix calculator, you can embed it on multiple pages by adding the app to each desired page through the Wix editor.
Can I create and add a calculator to my Wix website using Calconic Calculator Builder?
Yes, you can use the calculator builder at www.calconic.com to create and add a custom calculator to your Wix website. Calconic offers a flexible and user-friendly interface to design interactive calculators tailored to your needs. Once your calculator is ready, simply copy the embed code from the Calconic platform and paste it into the HTML widget on your Wix site. This method allows you to create advanced calculators without relying solely on Wix’s built-in tools.