Customizing a Gauge element
The Gauge allows you to create a colorful segmented bar that uses the results of your calculator’s formula field. The results are displayed on a colored segmented bar that uses fully customizable segments.
Element settings

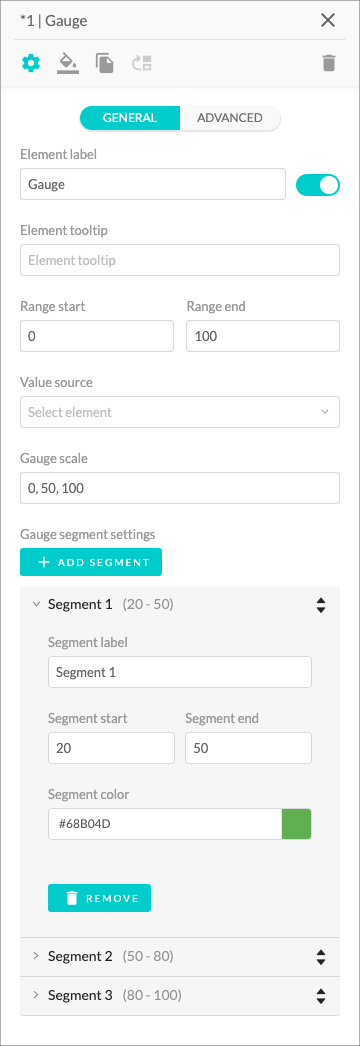
- The Element Label input field lets you name your element. The toggle controls whether the label is visible or hidden.
- The Element Tooltip is a text field that lets you give more context to each element or explain what information you require to input. Once enabled, it will appear as a small info icon next to the element title.
- The Range Start input allows you to set where the whole gauge will start and the Range End input field lets you decide where the whole gauge ends.
- You can choose which result from the previous formulas you want to use for the gauge tool in the Value Source drop-down menu.
- The Gauge Scale input field lets you choose which numbers will be displayed under the gauge. The way the numbers should be written are: from the lowest to the highest number, each divided by commas. The numbers should be between the minimum and maximum numbers chosen earlier.
-
Click on the + Add Segment button to add a custom segment. There will be three segments created by default, which you can fully customize or delete. There is no limit to the number of segments you can add to your gauge.
- The Segment Label input field allows you to name your segment. This label won’t appear anywhere. It is for your own reference only.
- The Segment Start input field lets you decide where you want the segment to start and the Segment End lets you choose where the segment ends. The segments should not overlap because this may lead to results being shown incorrectly. If the result overlaps with a previous segment, the previous segment will be given priority. For example, if the first segment is from 0 to 60 and the second one is from 30 to 90 and the result given is 40, the first segment will be shown because of how the segments overlap.
- The Segment Color input field lets you choose the color the segment layer, either by typing in the color code or clicking on the colored square near the input field and choosing it using the color selector.
- To remove a segment, simply click on the Remove button.
Tutorial
Find out more about gauge elements in this video below: