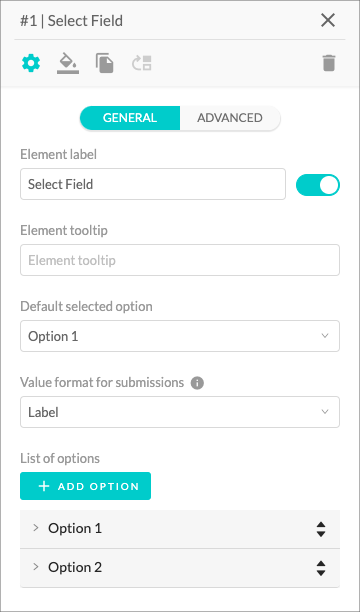
Customizing a Select Field element
The Select Field allows you to create a drop-down list of predefined selectable options. Users will then be prompted to choose only one of these options. The Select Field can employ any of the formulas using the predefined value of the selected option. The Select field only shows one option at a time – other options can be made visible by opening the drop-down menu, which is accessible by pressing on the option field.
Element settings

- You can name your element by using the Element Label input field. The toggle controls whether the label is visible or hidden.
- The Element Tooltip is a text field that lets you give more context to each element or explain what information you require to input. Once enabled, it will appear as a small info icon next to the element title.
- The Default Selected Option field allows you to choose which option will be selected by default.
- The Value format for submissions allows you to choose a value format from label, value and label & value to show in email submissions and Google Sheets integration.
- To add a new option to the list, click the Add Option button under the List of Options title.
-
Click the option to expand its settings, which will allow you to:
- Change the Options Label – the text that will be displayed to your calculator users.
- Assign an Option Value, which will be sent to the formula if that particular option is chosen by your calculator user.
- You can change the Order of the Options you added to your select field by clicking on the arrows on the right side of each option.
- Delete the option by clicking the Delete Option button.