Adding your calculator to your Webflow project
Have you built an interactive web calculator and want to integrate it into your Webflow project? It's really easy! All you have to do is copy your calculator’s code snippet and paste it in a specific place of your Webflow project. Follow the instructions below to do this.
And if you don't have a custom interactive calculator yet, learn how to create your first interactive calculator by following our step-by-step tutorial.
Step 1 | Retrieve your calculator’s code snippet:
- Login to your CALCONIC account.
- Click My Calculators.
- Choose the calculator you want to embed to your Webflow project.
- Make sure that the calculator is activated. If it isn’t, click the Inactive label to activate it.
- Click the Embed calculator button.

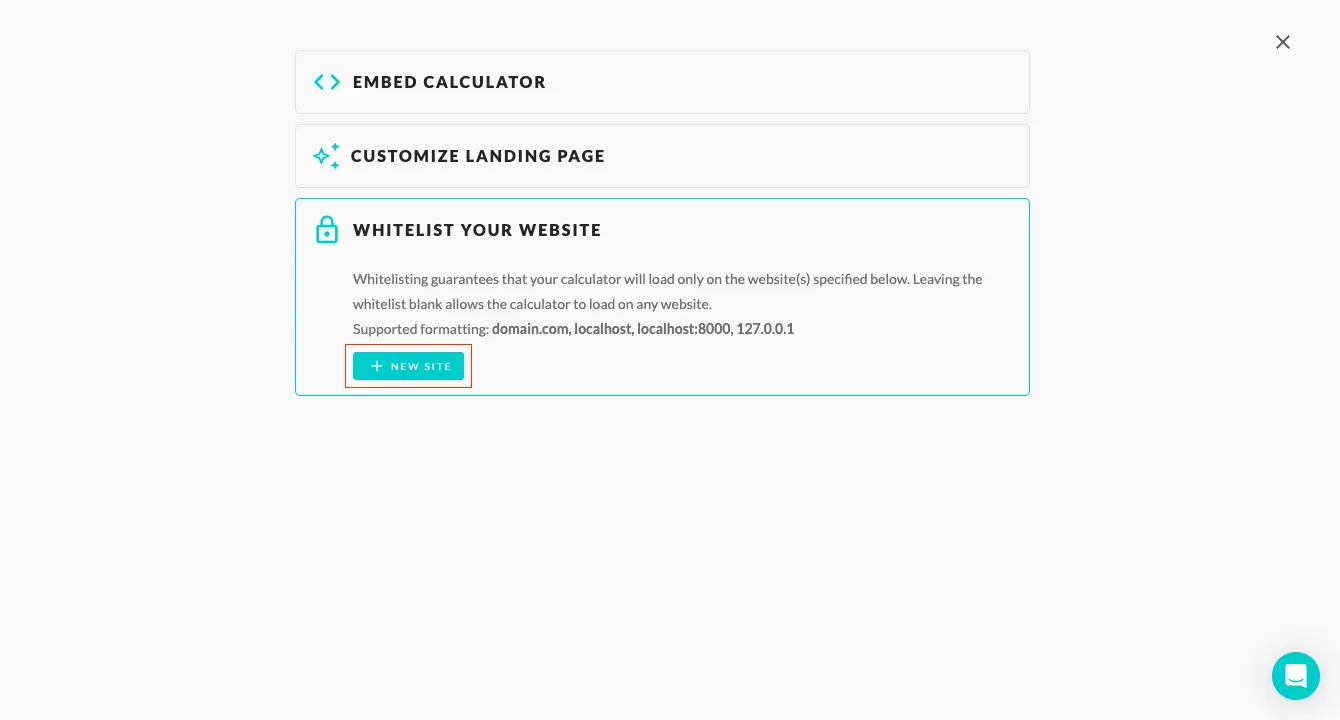
- (Optional) Click the Whitelist Your Website and + New Website button and add your website address to whitelist it. Note, website address whitelisting doesn't work with iFrame embedding.

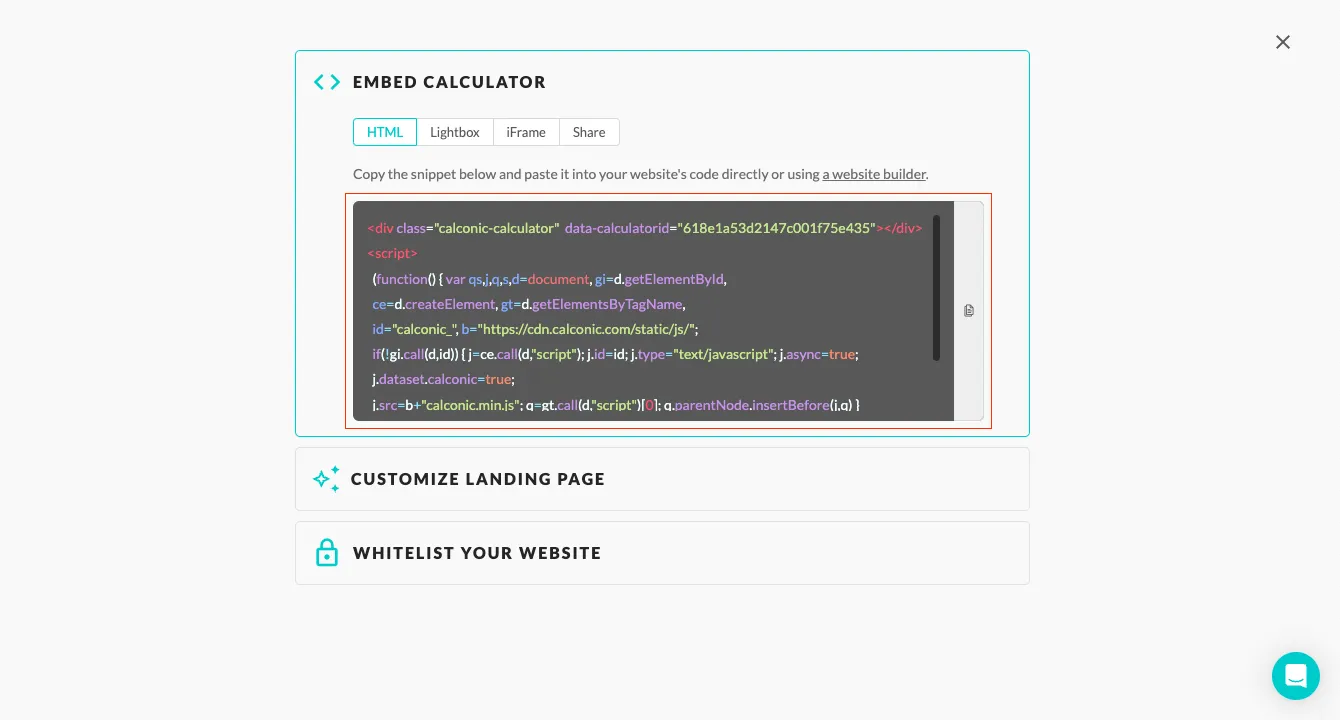
- Click on Embed Calculator and copy your calculator’s code snippet.

Step 2 | Embed the snippet code to your website:
- Login to your Webflow account and choose your project.
- Click the Add Elements icon.
- Add the Embed element from the Advanced section.

- Paste your code snippet, and click the Save & Publish button.
Webflow disables embedded scripts while in editor mode, therefore you might see the following placeholder instead of your calculator in your project. However, once you publish or export your website, the placeholder will be replaced with your custom calculator.
Frequently Asked Questions
What is a Webflow calculator widget?
A Webflow calculator is a custom interactive tool that helps website visitors perform personalized calculations directly on websites created with Webflow. The most popular widgets include price, quantity, and discount calculators that provide custom quotes and help businesses collect leads.
Can I use a custom calculator on multiple pages of my Webflow project?
Yes, you can embed the same calculator widget for Webflow on multiple pages by copying and pasting the same embed code into the desired pages or sections of your Webflow project.
Can I add a calculator to Webflow without installing a plugin?
Yes! With Calconic, you don’t need to install any Webflow plugins. Calconic is a SaaS platform that works independently. Simply create your custom calculator on Calconic, copy the embed code, and paste it into your Webflow project using the Embed element. This keeps your Webflow site streamlined and fast.
How do I update my Webflow calculator after embedding it?
Simply edit the calculator in Calconic’s builder. Any updates will automatically appear on your Webflow calculator widget without needing to re-embed the code. This makes managing your calculator easy and hassle-free.
