Linking calculator results with a quantity input field (Shopify)
Calconic calculators can send information to other input fields in your Shopify shop. For example, your calculator can automatically send its result to the quantity input field of the product page it is embedded to.
Try the calculator in the Calconic Demo Store to see how it integrates with the quantity input field.
By following the instructions below you’ll find out how to set up your calculator to output results to another quantity input field.
- Login to your Shopify account.
- Click Apps.
- Click the Calculator Builder by Calconic app.
- Click My Calculators and select the calculator you are building.
- Click the Gear icon on the left side.
- Click Advanced Settings.
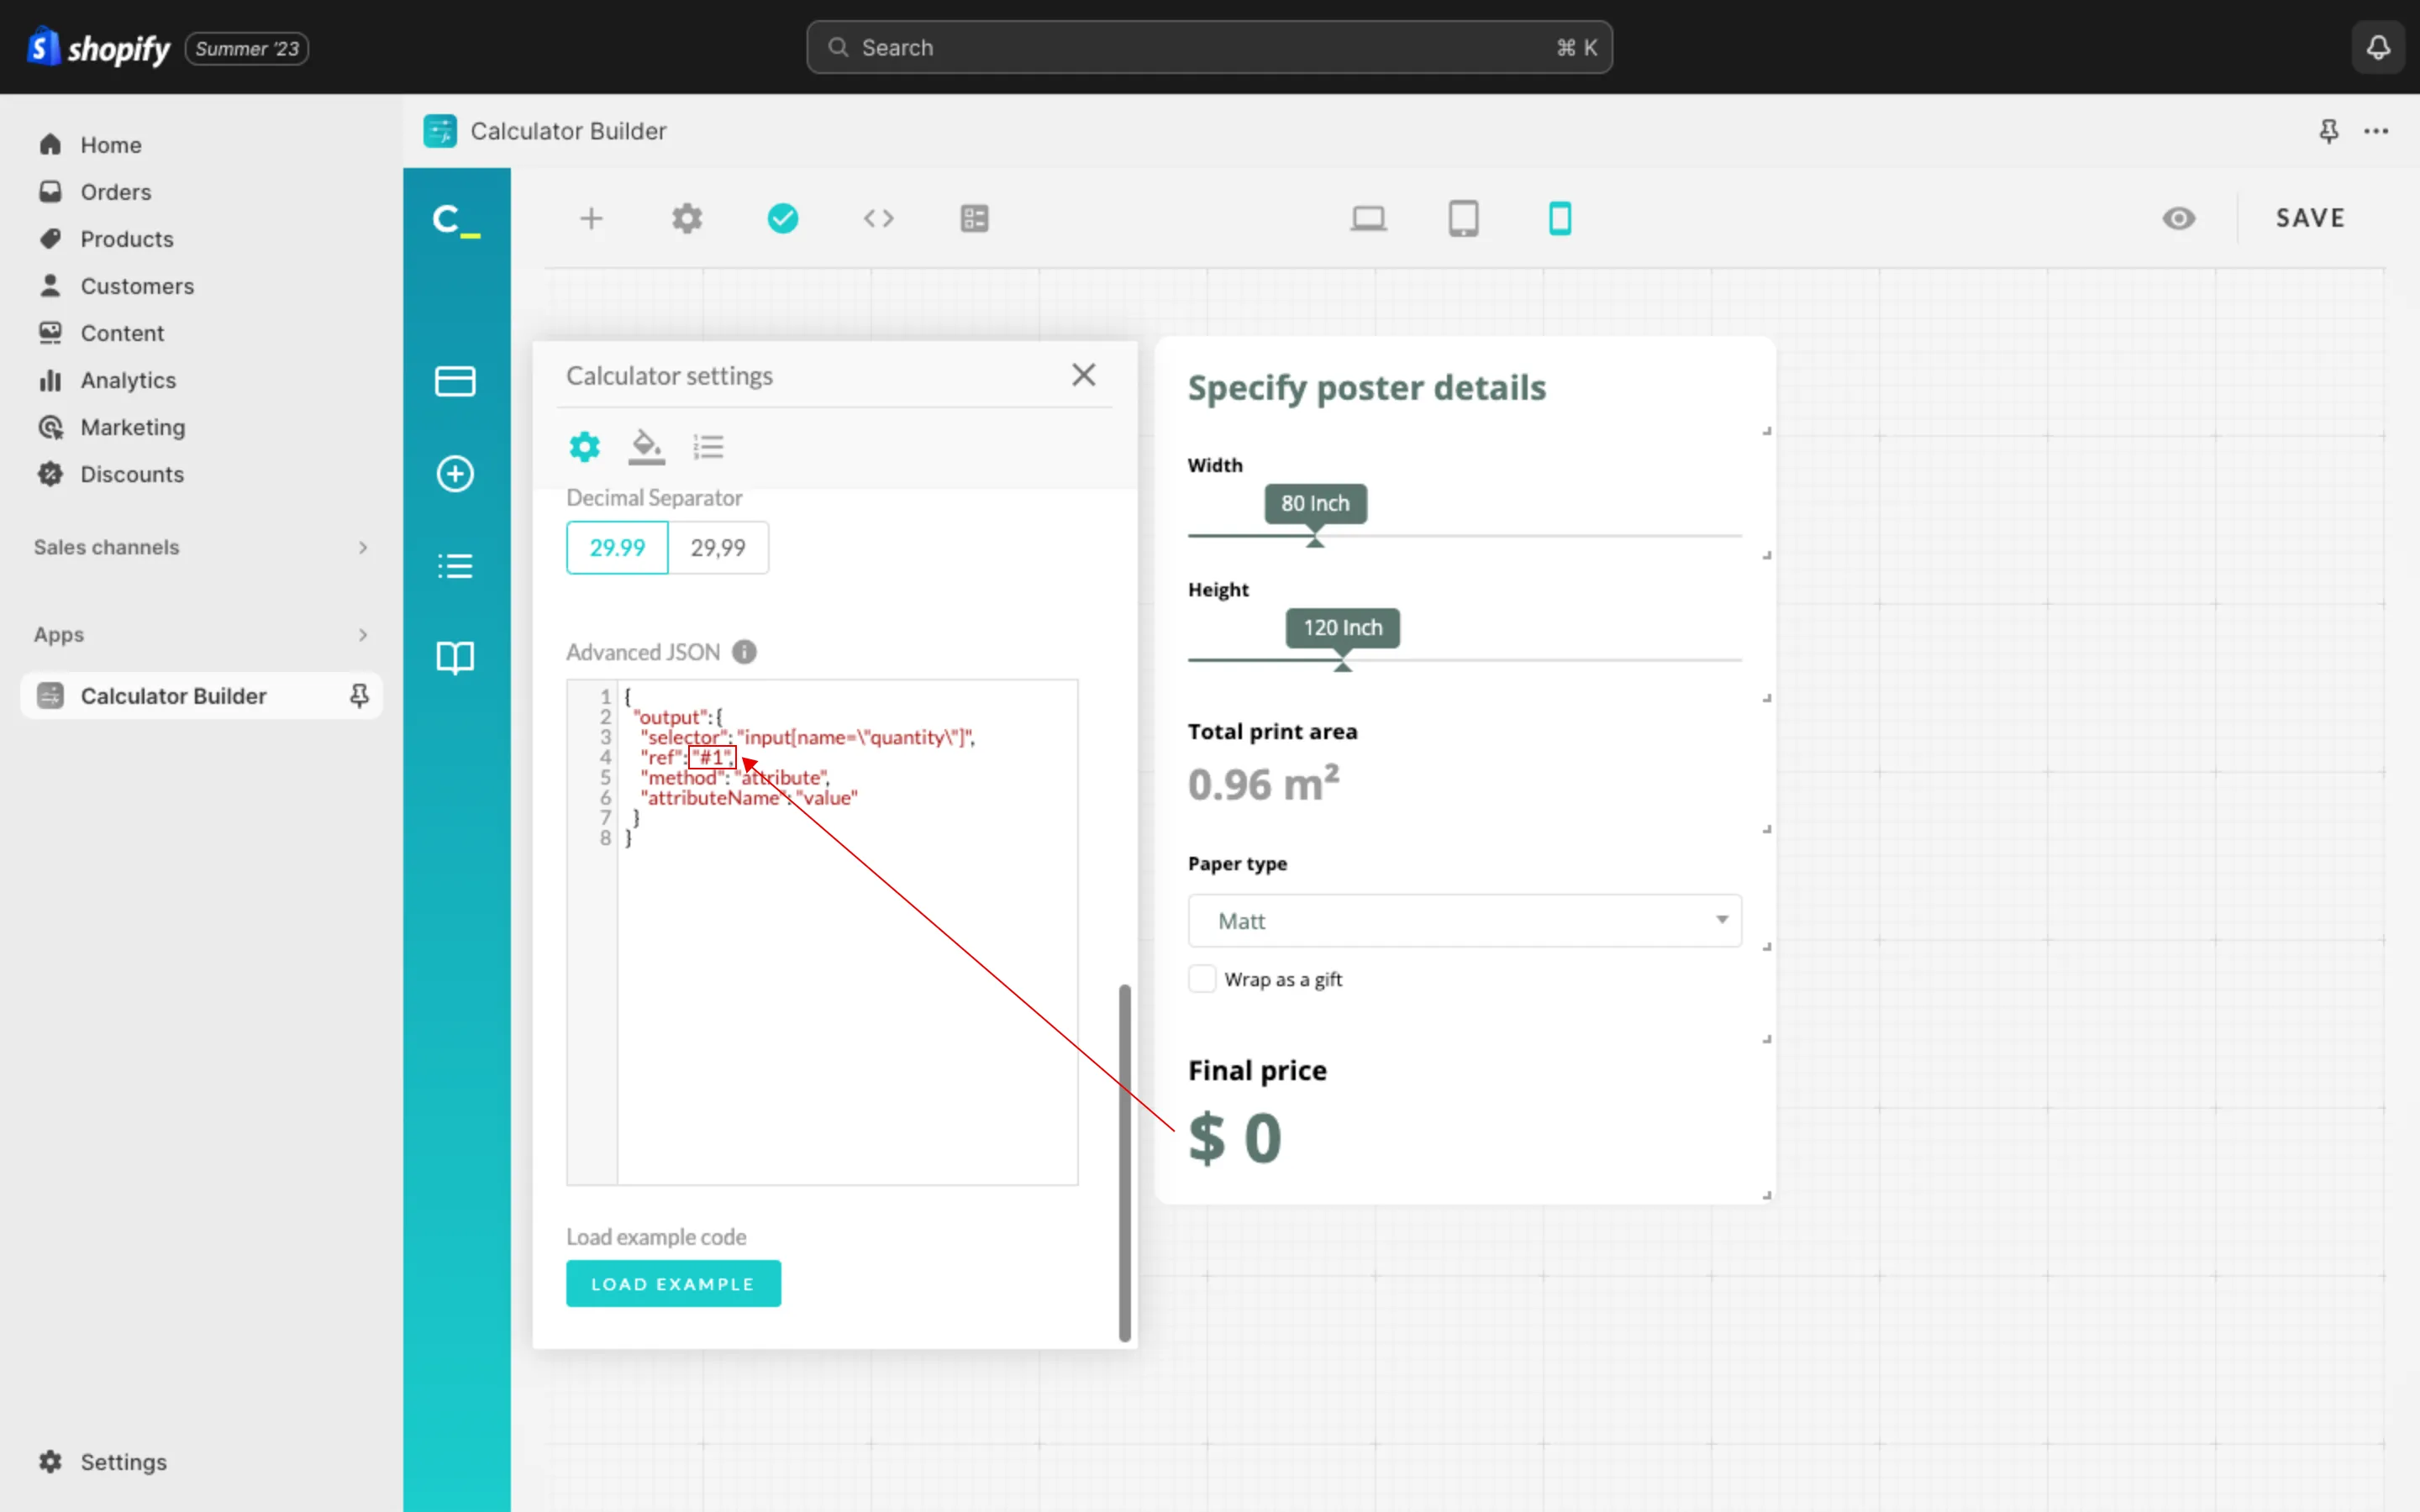
- Click the Load Example button.

- Select External Output Example.
- In most cases you won’t need to change anything in the loaded code except the ref (in the loaded example it is #3). Replace the reference with the ID of the input field whose result you want to be outputted to the quantity input field.

- Click Save.
- Embed the calculator to a product page (HTML or Lightbox mode only). See Adding your calculator to a Shopify shop page to find out how to embed the calculator to your Shopify store.
Please note that you don’t need to re-embed your calculator if it is already embedded to a product page.
Troubleshooting: Unhiding the quantity input field on your product page
The External Output method won’t work if the quantity input field is hidden on your product page. Some Shopify Themes have the quantity input field turned off by default, and you might need to turn it on manually. Follow the steps below to unhide that input field:


