Adding your calculator to a Shopify shop
You can build a custom calculator and add it to your Shopify store in two ways - using calconic.com or installing the Calculator Builder by Calconic app from the Shopify App Store.
To see how the calculator can be used on the page, visit our Calconic Demo Store.
Please note that calculators created using the Calculator Builder by Calconic app from the Shopify App Store won't be accessible on your Calconic.com account and vice versa. These are two separate systems, although they look and feel the same.
To add your calculator you'll need to retrieve your calculator’s code snippet and paste it to the preferred product of your Shopify store. Follow the instruction below to find out how to do that:
STEP 1 | Retrieve your calculator's code snippet:
- Sign in to your CALCONIC account or open the Calculator Builder by Calconic on the Shopify Admin.
- Click My Calculators on the left side menu.
- Choose the calculator you want to embed to your Shopify website. If you haven’t built a calculator yet, follow our step-by-step tutorial entitled how to create your first interactive calculator to find out how
- Make sure that the calculator is activated. If not, click on the Inactive label to activate it.
- Click the Embed calculator button.
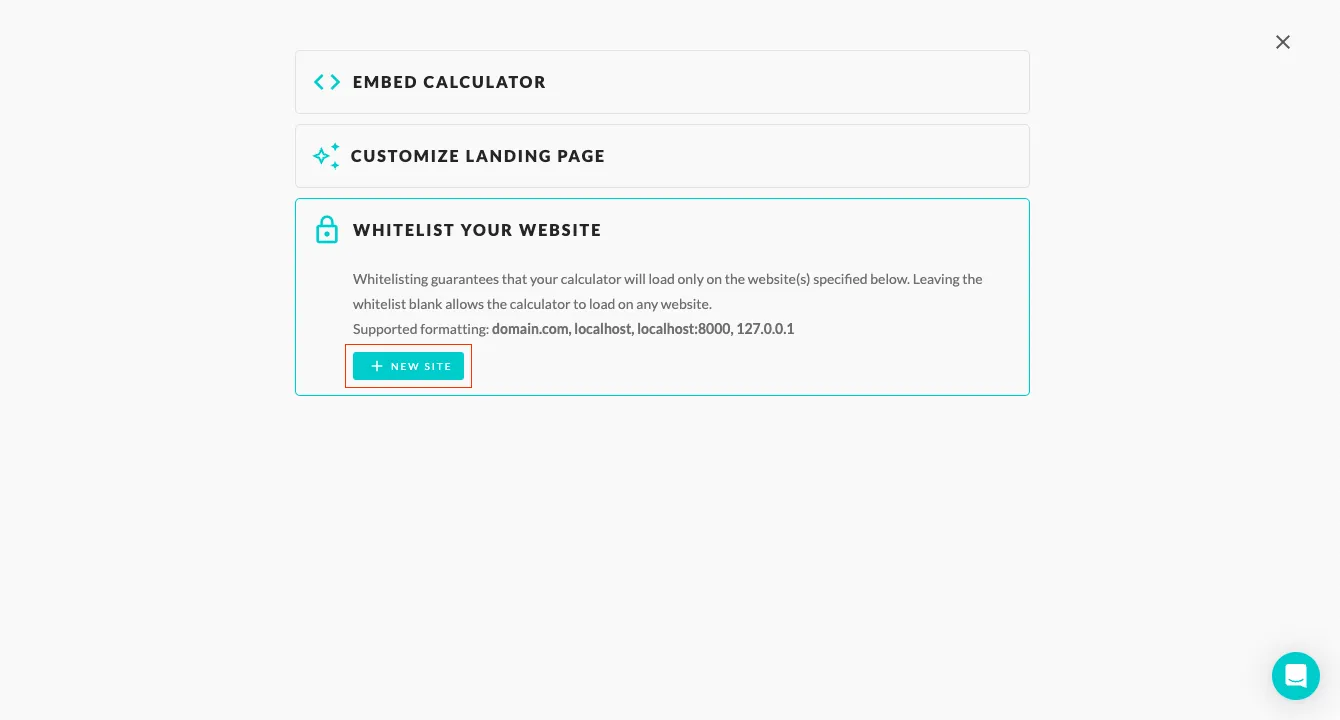
- (Optional) Click the Whitelist Your Website and + New Website button and add your website address to whitelist it. Click here to learn more about what whitelisting is and why it might be important for you. Please note, this step is not available in the Calculator Builder by Calconic app.
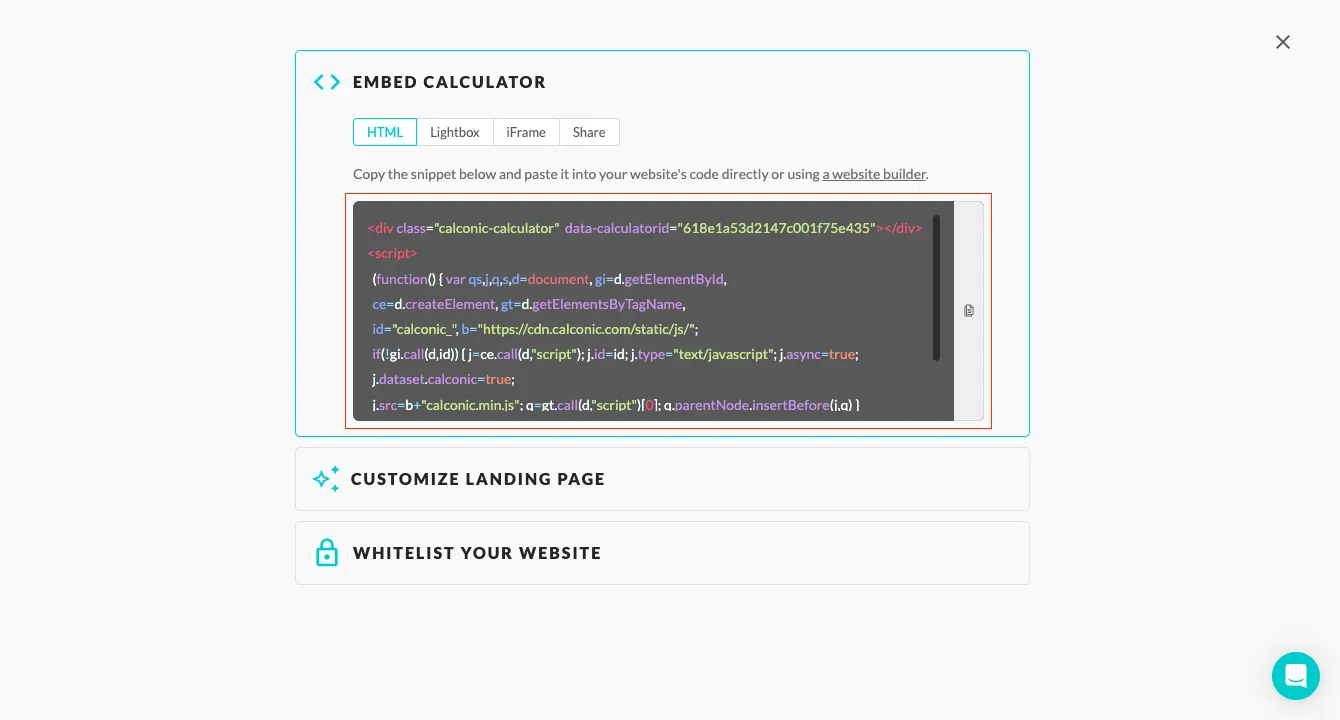
- Click HTML if you want your calculator to appear directly on the product page, or click Lightbox if you want to embed it as a pop-up (lightbox).
- Copy the calculator’s code snippet.
STEP 2 | Option 1 | Embed the code snippet to the product page:
- Sign in to your Shopify account.
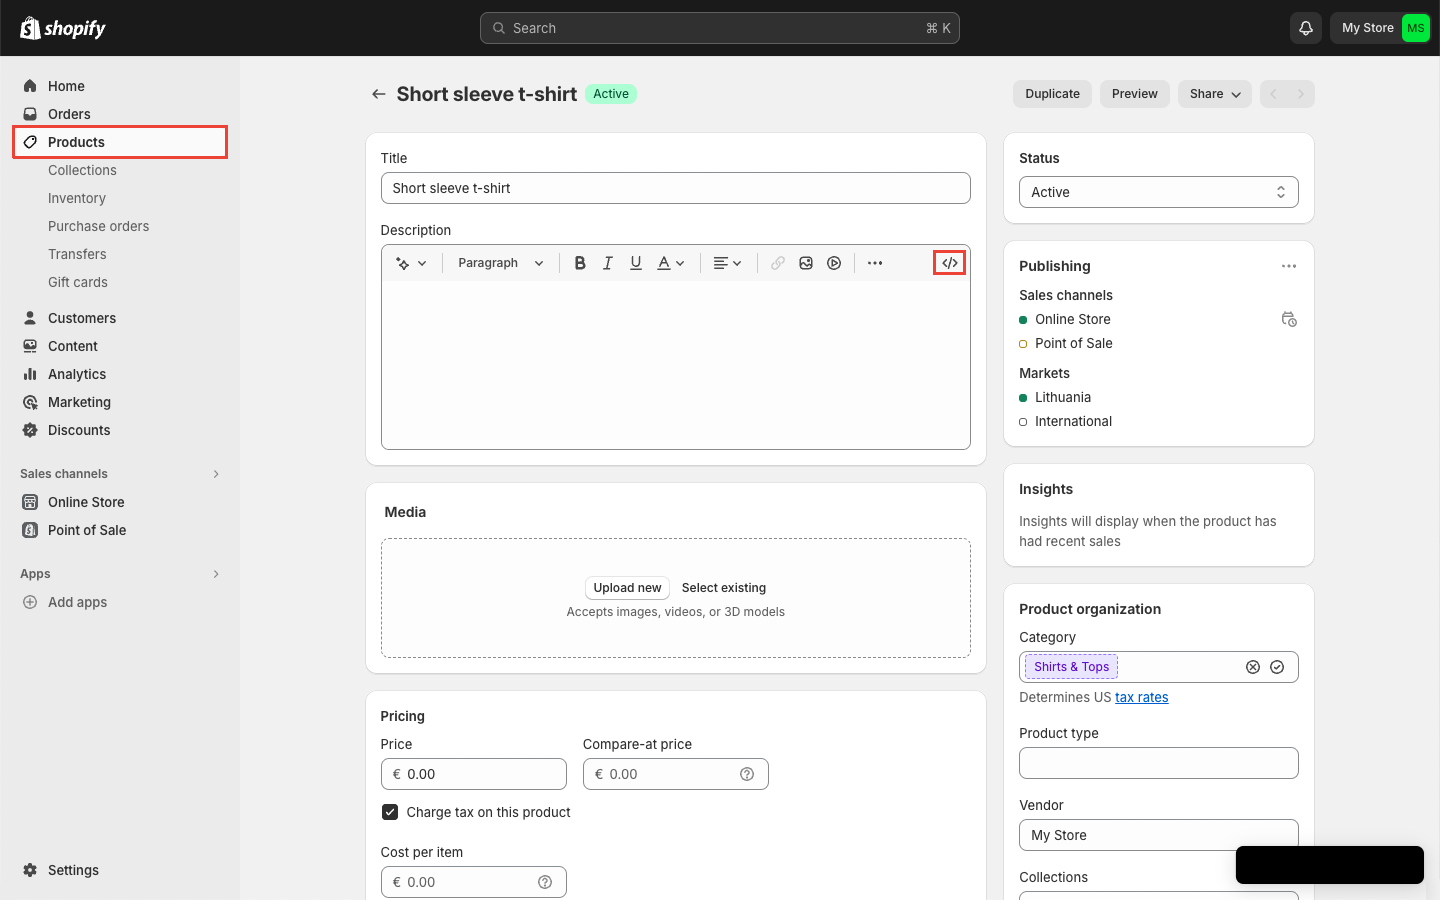
- Click Products from the Shopify menu.
- Select the product where you want to add your calculator.
- Click the Show HTML icon at the top-right corner of the product content editor.
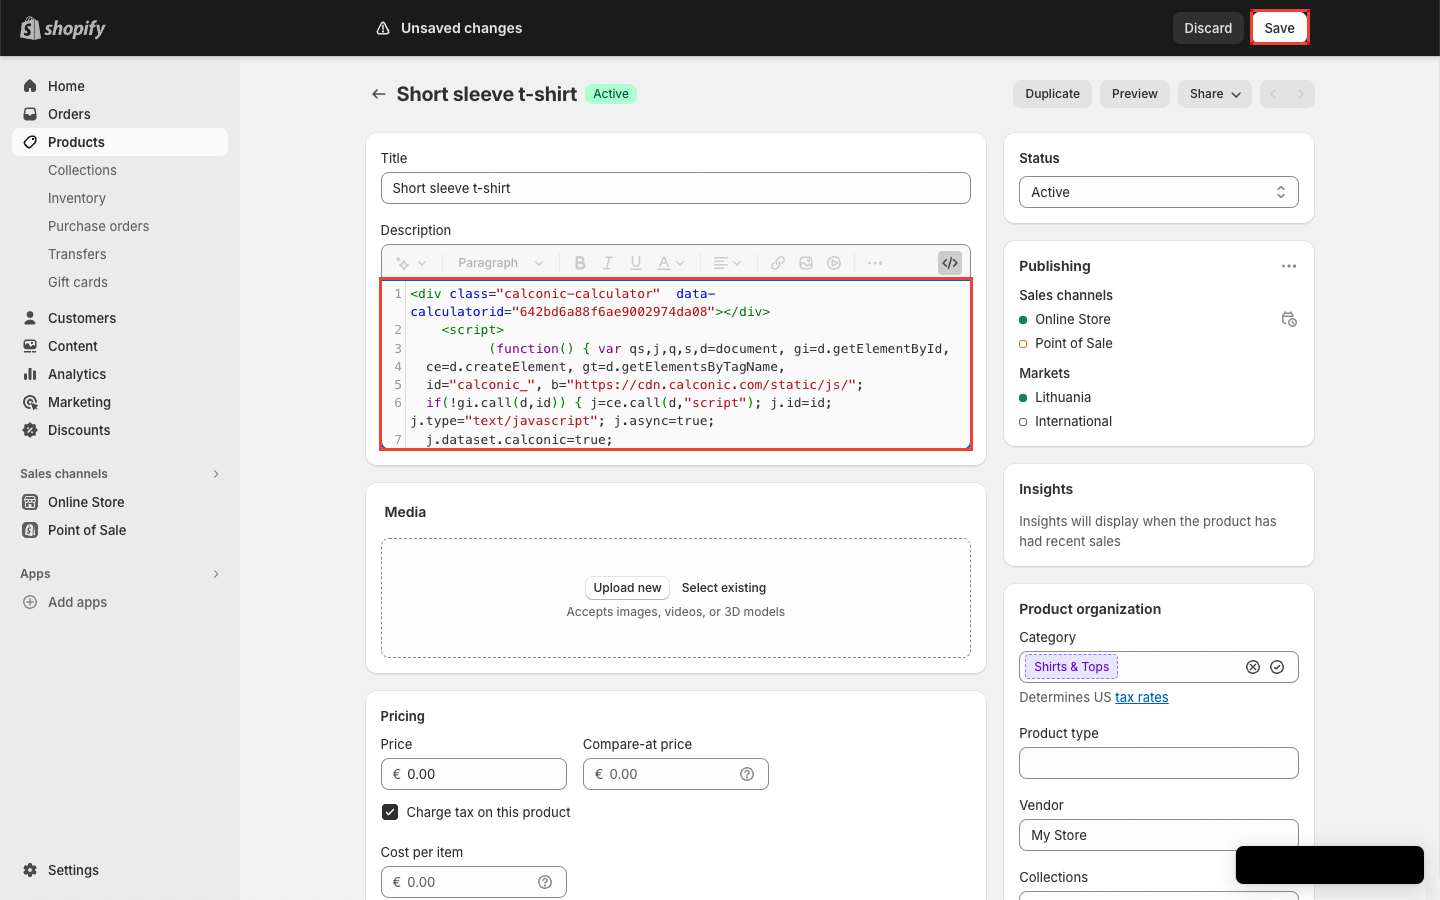
- Paste the code snippet.
- Click Save.
STEP 2 | Option 2 | Embed the snippet code to the page:
- Sign in to your Shopify account.
- Click Online Store from Shopify menu.
- Click Pages.
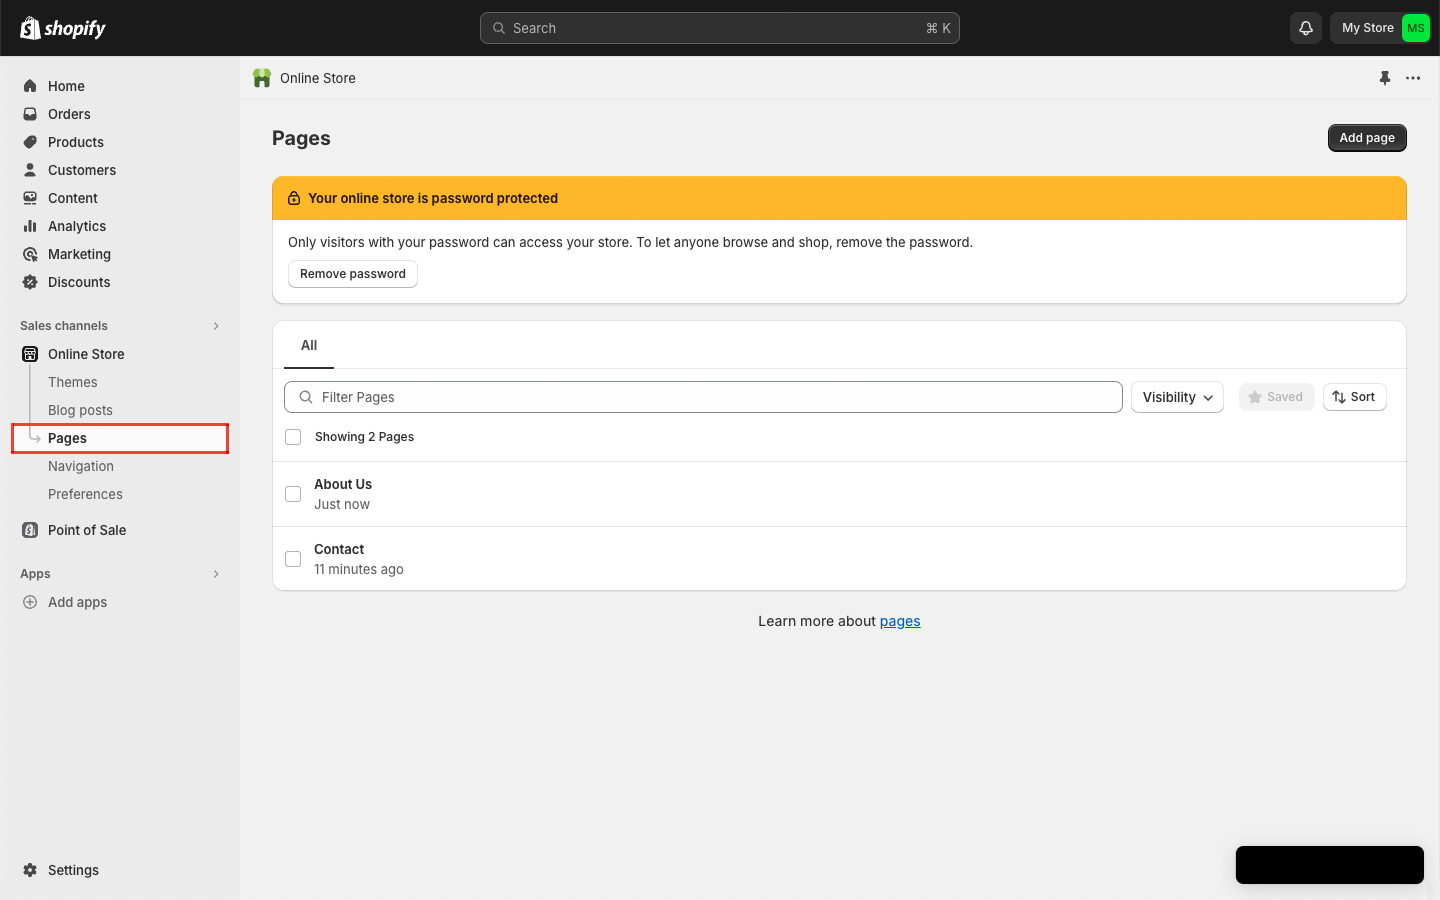
- Select the page where you want to add your calculator.
- Click the Show HTML icon at the top-right corner of the product content editor.
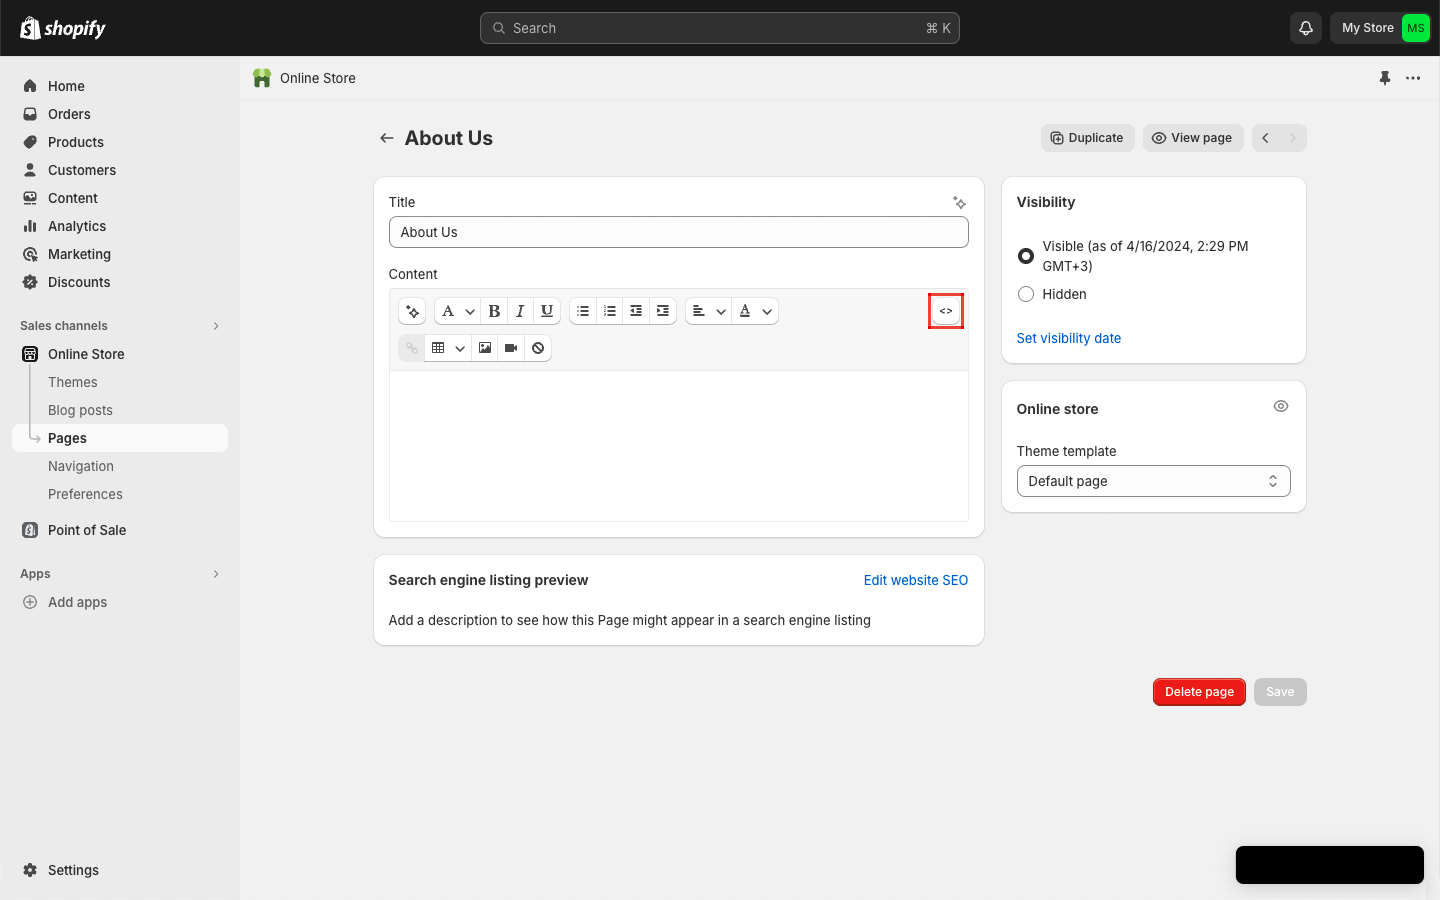
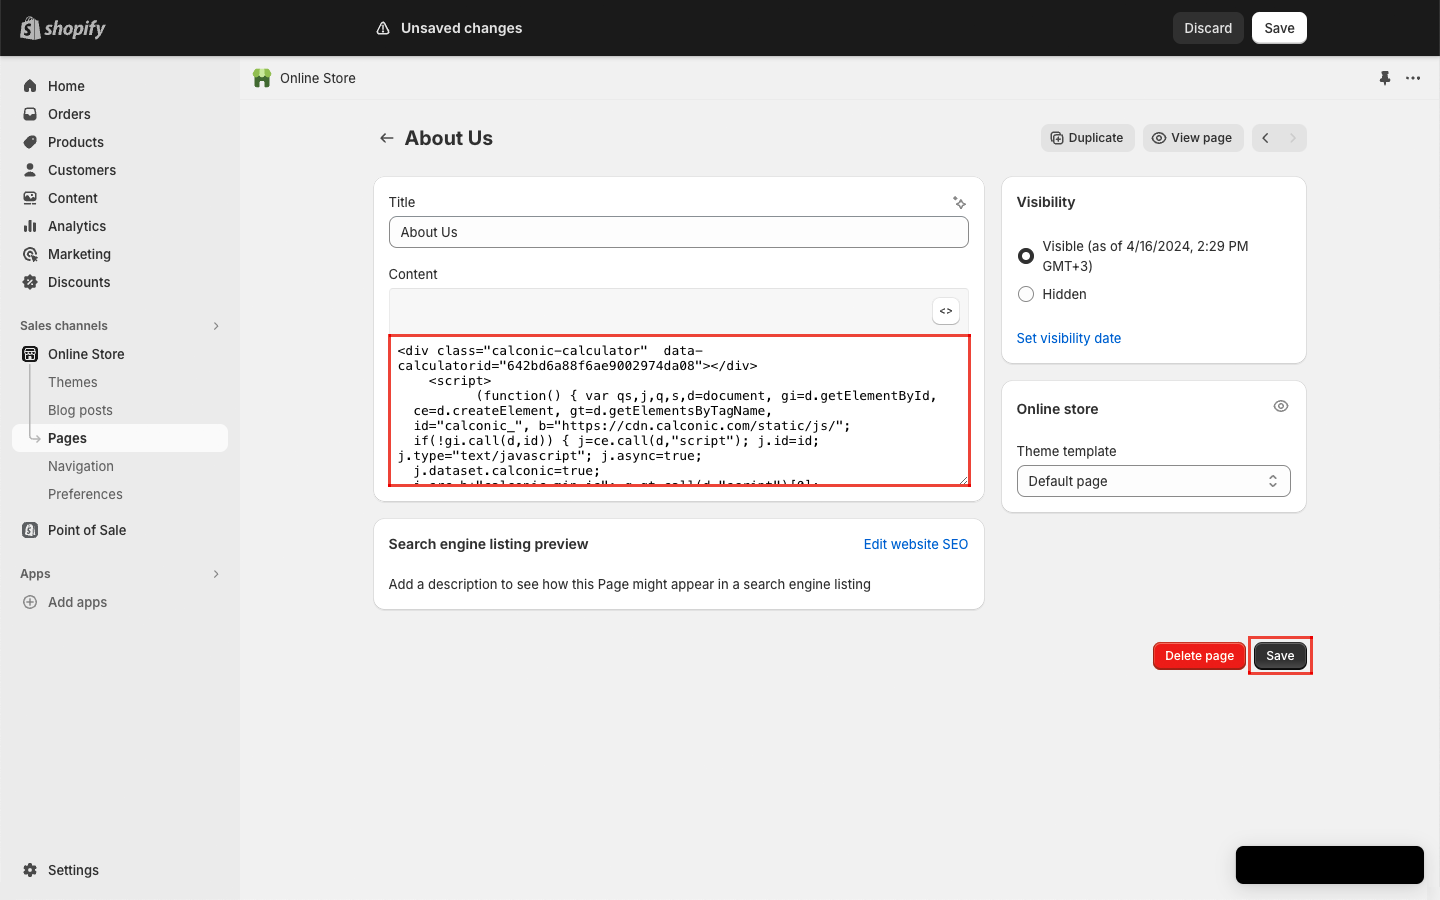
- Paste the code snippet (please find pictures above)
- Click Save.
You can also link your custom calculator to Shopify checkout. That way your users preferences and calculations can be added to the cart straight from your product page. This applies only to the Shopify Calculator Builder App.
Benefits of Integrating a Custom Interactive Calculator to Shopify Shops:
- Informed Decisions: Customers see real-time cost implications based on product choices or customizations.
- Reduced Cart Abandonment: Transparent pricing minimizes surprises and boosts checkout confidence.
- Enhanced User Experience: Interactive tools keep users engaged, leading to longer site visits.
- Custom Orders Simplified: Clear price breakdowns for tailor-made products streamline order processing.
- Trust Building: Transparent calculations foster trust, positioning your brand as open and customer-centric.
- Increased Conversions: Empowered with clarity, more users are likely to finalize their purchases.
Frequently asked questions
What is the best Shopify calculator app?
Selecting the optimal calculator app for your Shopify store depends on your specific business needs, from small shop setups to complex pricing for large e-commerce stores. Calconic's Calculator Builder is a versatile option that caters to both, offering customizable solutions to enhance user engagement without requiring coding skills. While some also consider Custom Price Calculator for basic pricing needs and Profit Calc for profit tracking, Calconic stands out as the most flexible and user-friendly choice.
How can a product pricing calculator improve my Shopify store?
A product pricing calculator helps Shopify store owners offer real-time price estimates based on customer inputs, such as quantity, size, or additional features. This transparency simplifies complex pricing models and enhances the shopping experience. By allowing customers to see tailored pricing instantly, you reduce hesitations, build trust, and encourage faster purchase decisions, ultimately boosting your store’s conversions and customer satisfaction.
Can Shopify price calculator handle discounts or promo codes?
Yes, a quote calculator built with Calconic can be set up to include discounts or promo codes. You can configure your Shopify calculator to dynamically adjust the total based on the promotional value, providing a seamless checkout experience.